Software Reviews
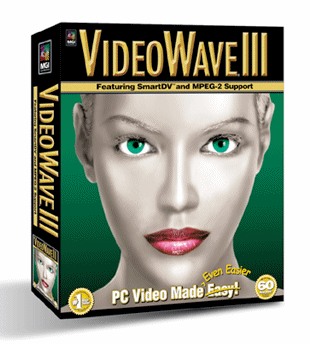
Video Wave III by MGI Software
Reviewed by Laurence Fenn

Video Wave III has everything you need to create high quality videos, allowing you to capture footage, and create storyboards with animations, titles and special effects. Your finished production can be output to video or to a file, and thanks to its Smart DV technology it's very quick at rendering the final results. It requires a Pentium II 266 MHz (Pentium II 350 MHz recommended), 45 Mb of hard disc space for the program, 1 GB of hard disc workspace, 64Mb RAM (128 Mb recommended) and an SVGA card with at least 4MB RAM.
Installation for fairly easy, and the tour guide provided was very good. The interface is nothing like a standard Windows program, so you will need a guide to get use to it if you haven't used a previous version of the software.

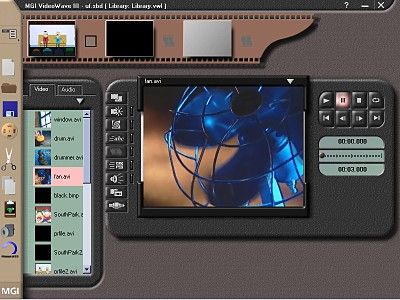
Capturing your video takes a while to set up, specifying a video template for the frame rate, video size and compression. Unfortunately, when I tried to capture video, it would only allow the NTSC American format of 352x240 at 29 frames per second, instead of 352x288 at 25 frames per second for PAL, the British format. According to the help guide the default format is determined by the country setting of Windows, but my PC was definitely set to the UK region. After a few re-installations I tried the web site and found a free upgrade to version 3.5. After installation this fixed the problem, but the sound was out of sync with the picture. I eventually captured the video used the software supplied with my card, a Matrox Mystique. This is a fairly old card and may not be properly supported by the program. Once you have your video footage, it's time to create your production. The Storyline at the top of the page shows each scene or video clip divided by a transition. The clips can be videos or pictures, and the transitions vary from a plain cut, dissolve, wipe, reveal, swing door and many others. The Library on the left of the screen shows all the video and audio clips you can use, and you can import new files here. Any video captured is automatically added to the Library by default. The main part of the screen is the mode console, which changes according to what function you are doing. The function is selected by the icon on the left of the viewscreen:
Cutting Room - mark beginning and end points for a scene, extract audio, video of a still image from a scene.
Darkroom - Adjust the brightness, contrast or colour of a scene of graphic, or apply a pre-set filter.
Special Effects - Add effects like swirl, emboss and tile to your scene.
Text Animator - Select different styles and colours, and fade or scroll your text over your scene.
Transitions - Choose from fifty different transition effects to change between scenes.
Video Animator - Apply video effects such as blend or chroma-key (remove a colour from a scene and replace it with another scene, like when the weathermen stand in front of a blue screen to show the map)
Audio Studio - edit audio tracks, mix audio, fade tracks. Six two channel audio tracks can be mixed.
Output to Video - play your video full screen or output to a device connected to your video capture card.
Capture - Video, still image or audio from an outside source.
My video captures use a Matrox MPEG AVI codec, which meant that a final output production in the MPEG format was very quick, compared to programs like Ulead Media Studio, which can take up to an hour for a 30 second scene with complex effects. This program takes a few minutes, as it does not re-render the picture. However, the way that each part of the production is divided up makes it difficult to synchronise your work. Just applying a fade from black in the beginning of a scene and fade to black at the end took a lot of work, and several renderings to get the desired effect. I could not see exactly where the effect was going to start. Marking points according to audio content is also difficult with the controls given. With other video production programs to can see a wave graph of the audio, and so can pick the exact point you want. You can render part of a storyline, but only by selecting by scene, not time. This was annoying, as you couldn't select a small part of the production. When you saved as a standard AVI file with a different codec, it takes a long time to complete. You can save as MPEG1 (which is used for Video CDs and standard MPG files on the web) or MPEG2 (which is used for DVD and higher quality videos) or DV for digital video cameras, if your capture card is capable. Details of the formats are explained in the manual, along with hints on how to get the best results for your captured scenes.
The non-standard interface makes it difficult to use, but maybe it's because I'm used to the Windows style of controls that you get with Adobe Premier and Ulead Media Studio. You are always asked to save your production before rendering it, which is annoying, if you only have a simple scene. Mind you, the saved productions are only 2k in size. The lack of flexibility outweighs the speed of the productions. If you can some video and the volume is too quiet, the program will not let you amplify the volume. Creating MPEG files with audio rates other than CD quality in stereo or mono seem impossible, but this maybe due to the separate audio and video templates.
If you are first time video producer, then this will certainly do the job, and do it quickly, but if you are experienced in producing digital video you may be frustrated by the lack of flexibility that the program offers.
Review first appeared in ROM Newsletter of the Guildford PC User Group in May 2000 (Vol.10,No.5)
Back
