Hardware Reviews
Ion Pics 2 PC Scanner
Reviewed by Laurence Fenn
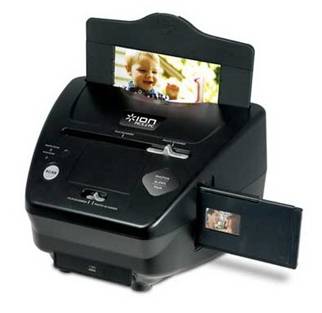
This all purpose scanner from Ion turns all of your photos, slides, and negatives into digital images. Ion are known for their audio conversion hardware, particularly their USB turntable which allows you to transfer vinyl records to your PC. I have one myself and it really does the job, but I digress. This device is the latest in their image range, which included Slides 2 PC and Film 2 PC. However, with this you can easily convert 35mm slides, negatives and 3x5, 6x4 or 7x5 photos.
It is powered via the USB port and connects using a standard supplied cable with a mini USB socket on the device. Using the supplied CD you install the driver for the device and the photo software, and then you can plug in the scanner. It showed up on my Windows 7 system as a Web Cam, which gave me a clue as to what this device really is. It is quite light, with a slot near the back to take the plastic trays that hold your photos, and a slot on the side to take the slide trays. These trays lock into position and can only be fed from the right to the left. On top is a switch to select either slide or photo scanning, a scan button, two LEDs for Film Scan/Photo Scan and another switch to change between slide and film scanning. Why there are two switches I do not know, but the larger one moves something inside the box, presumably a light source so it either illuminates the photo or backlights the slides. Still, having to move two switches seems to be making the process a bit more complex.
Unlike a flatbed scanner (or at least the flat bed scanners I've used) you only have two choices for the resolution, 1800 or 3600. This maybe fine for slides but for photos this DPI setting is a bit high especially as the 3600 is interpolated. Using the software supplied is quite easy, but there are some bugs in the software. Blaze Photo 2.0 is installed from the CD without any problems but some features are built into the software rather than the hardware driver. Due to the way the photos are held in one of the trays (depending on the size of the photo), there is a border around the photo of about two millimetres or so. The photo slides into the tray and is held in by a series of small lugs, which cover part of the photo. The software automatically crops these out before saving the image, but that means you are losing part of the photo. If you have taken a decent photo then it is highly unlikely that anything important will be lost in the surround edges, but you should be aware of it. If you use the scanner with another graphics program and scan a photo in, you will have the black blocks around three sides of the resulting scanned image. In fact, using the device outside of the Blaze Photo software means you do not get a chance to choose the type of image, DPI, colour depth, etc. as these options do not appear to be included in the scanner driver.
There are a few spelling mistakes in the software:
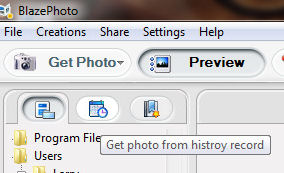
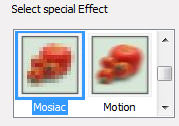

When you click on the Get Photo button and choose to capture from the Film scanner (as opposed to the Photo scanner) you get the Select Scanner and Video Device dialog. You can set where the files are saved, the colour depth (24 or 32 bit), the DPI (1800 or 3600), the file format, what the film type is (Slide, negative or B&W negative) and whether to open the Brightness manual Control box. When you click OK you see the OVT Scanner dialog, which has a preview plus five buttons. The Capture button actual captures the image, and the Scan button on the device does the same thing as pressing this button. The Save button obviously saves the image, the Delete button removes the scan from the film strip at the top of the dialog, and there is an Exit button to quit the scanning process.
The Colour Brightness adjustment button brings up another untitled dialog:
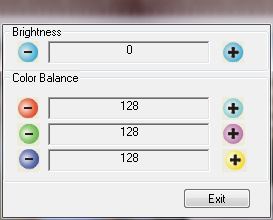
Unlike other balance like control dialogs there is no bar to pull to either side, only plus and minus buttons to click on to change the value. The live preview changes according to the settings.
I tried to scan a transparency and immediately came across a problem. The slide holder has three holes and indentations for the square transparency, but the windows are rectangle. This means you can only scan transparencies that are 35mm rectangular. The older transparency I was trying to scan was square, and so part of the image was cut off.
Scanning a negative using the film holder is simple as it has six holes and lugs inside to place a film strip in the exact position. Like the slide holder this locks into the correct position once you push it into the scanner, but again I doubt you could scan any other negative size other than 35mm. The image size from a scan varies, despite the same DPI resolution. A colour negative came out at 2592x1680 pixels, whilst on the Epson Flatbed it was 2490x1614. A black and white negative on the Epson was saved with 256 grey scale colour depth. The Ion still saved the black and white scan as a 24 bit colour photo. All the images from the Ion were saved with a 96 PPI (Pixels per Inch) setting from the program whereas the Epson Flatbed with PSP X3 saved the same PPI setting as the DPI it was scanned with, i.e. 1800.
The scanner only has one real resolution, of 1800 DPI. The 3600 DPI setting is interpolated, which means the driver is guessing what should be in the picture to give the application a big image, rather than a true 3600 DPI scan. It may be fine to scan and print standard size photos but printing any larger sizes would show the lack of detail originally captured. Interpolation is not really suited for photo scanning as the resulting scan maybe bigger in size, but will be fuzzy and a bit blurred. It is more suited to line graphics when you want to print them out in a large size.
The software is very basic, and whilst it offers some red eye removal, colour correction and sharpening tools it is no match for a dedicated graphics program. There is no way to clone a small area of the image, to remove a scratch or spot on the picture, and this is the one tool I use the most when scanning in old photos. Apart from the odd crash under Windows 7, the software works okay, but I couldn't really tweak the pictures as I wanted. I ended up just saving the scans and then opening the images in a graphics editing program.
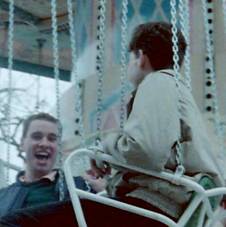
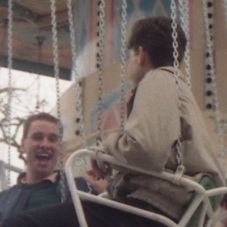
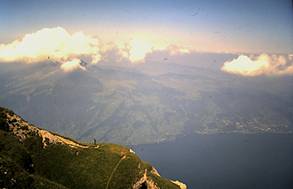
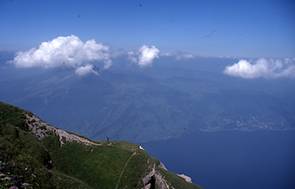
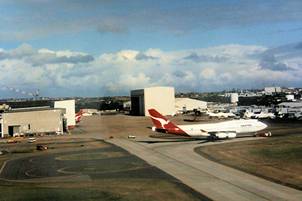
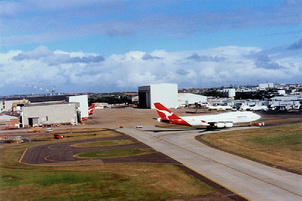
Comparison of results - Pics 2 PC vs Epson 1660 Flatbed scanner
 |  |
 |  |
 |  |
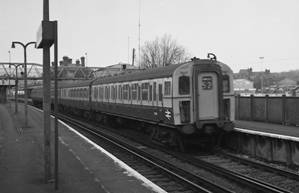 |  |
From the examples above, you can see the backlight can really affect the scanning of negatives and slides. Photos come out better, but did need a lot of post processing to correct the odd colour balance.
Product Specifications
- Image Sensor 5.1 megapixel CMOS sensor
- Lens Specification f = 4.83
- Automatic Colour Balance
- Automatic Exposure Control
- PC interface USB 2.0
- Scan High Resolution 3,600 DPI interpolation resolution
- Light Source Back Light 3 white LED
- Power From USB port
- Dimensions 220 x 208 x 147 mm
It may be easy to use, but the quality of the scan is poor to say the least. It could be argued that if you have a bad picture then you are going to get a bad scan, but there is so much you can do to get a good picture by editing it. Out of focus photos cannot be saved, no matter how much sharpening you use post processing, but faded colour, over exposure (to a point) and other problems can be fixed with graphics editing program. This all depends on having a good quality scan of a bad photo, if you see what I mean, and the Pics 2 PC just doesn't give you one. Whilst it takes up to 30 seconds to scan a negative/slide with a flatbed scanner, the quality is much better than what the Pics 2 PC WebCam can provide. The light used to illuminate the negative/slide is a bit too bright and washes out the colour in the photo and can make pictures look dull. The device effectively takes a 5 megapixel photo of the slide/negative/photo at a fixed distance from the original with a light source.
The bugs in the software and the unnecessary double switches to change between photo and slide/transparency, plus a scan button that only really mimics clicking on a capture button in the software means I would probably recommend a flatbed scanner with the ability to scan negatives/slides, as you would have much more control over the process. It may be easier to use but I would rather have a better quality picture that took a bit longer to scan than one that was quick to get but didn't look very good.
Back
