

Software Reviews
Corel Paint Shop Pro Photo X2 by Corel
Reviewed by Laurence Fenn

I have watched in interest the development of Paint Shop Pro from its humble beginnings in 1992 as a shareware product by Jasc Software. Corel took over the company in 2004 and have continued to develop the software in competition to the vastly more expensive Adobe Photoshop. Whilst some of the features of the new X2 version are an improvement over the XI release of last September, some are not.
Apart from the fact that version 12 (as this is) should be written as XII if Corel are going to stick to their roman numeral numbering, I found a few problems with the software just after installation. As with the other versions, it takes no notice of any previous versions on your system, so you can install version X2 (as I will call it) along with the previous XI or any other previous incarnation. Some software packages will see previous versions installed on system and offer to remove them during the installation. There's no good or bad thing about this, but with a graphics program you're unlikely to need to have several different versions.
A system tray icon appeared which turned out to be the photo downloader. Designed to help transfer photos from cameras and memory cards, this is a duplication of the functions of software usually included with digital cameras (certainly with the ones I have owned or reviewed). If the software is aimed at people who don't know much about editing pictures, they are not going to know to remove any automatic downloading program included with their own camera. I don't bother with the docking station (and subsequent automatic photo downloads) with my camera as I have a card reader. I put in the SD or Compact Flash card from the camera and Windows detects it and asks what I want to do with it. The Photo Downloader replaces the autorun feature, and can detect pictures on CDs, cameras and memory cards. It can copy the pictures to a folder of your choice, with a subfolder named after the date or your own, and it can also rename the pictures. You can decide to start X2, Express Lab or Windows Explorer to view the pictures.
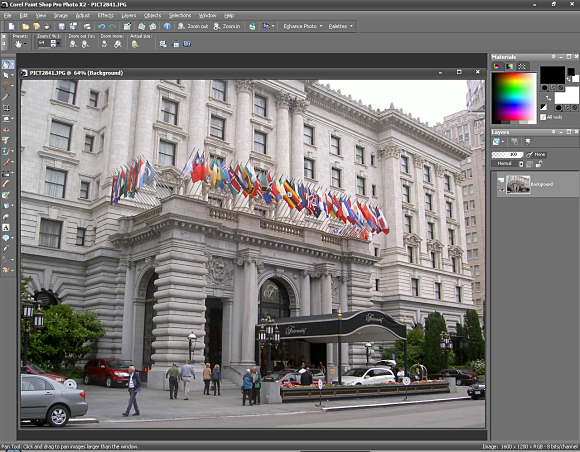
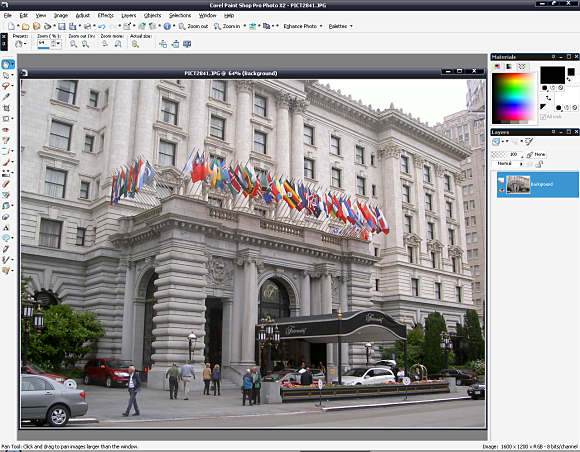
Running the program for the first time shows the new Graphite Interface. Rather than using the standard coloured interface that all your other programs will use (based on any theme you may have set), this uses a dark grey background with white writing, designed to the photos look their absolute best while the user edit them. Several programs 'skin' themselves to make the interface look different, but call me old fashion, I like the way the normal interface looks. Thankfully, you can just untick the 'use Graphite Interface' option in a drop down menu to use the normal menu colours. It can make a difference to how your photo looks just by the fact you have a dark background on the interface and workspace.
A new feature is the HDR Photo Merge. Some cameras allow you to takes several pictures with different exposures and this function allow you to merge them together to create a composite image with greater shadow and highlight. This technique is known as bracketing, and will only work with certain cameras or if you use a tripod when taking your shots. As my camera is one of those old fashioned types that can only take one picture at a time with the settings I make, I couldn't test this feature for myself. If I want to create a high contrast image I'll edit an existing one rather than combining several shots. Other graphics programs have this feature as well, but this is not something the average consumer will need.
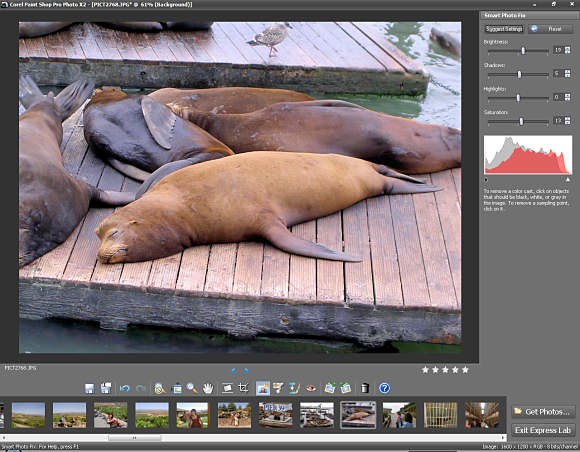
Express Lab is a new function that places Paint Shop Pro's main photo editing tools into a simpler interface. You can select it from the menu or within the Organiser. I found that Express Lab only works if the Organiser is allowed to catalogue the folder where the images are. As I had several compilation discs of images I did not want to catalogue, I set a general folder of just the drive letter to stop the Organiser slowing down my computer as it searched the drive for the pictures. When I started the Express Lab and clicked on Get Photos, you have the choice of Folders or Organiser. The latter will only show the folders you have told it to add to the catalogue (or rather the ones you have not excluded). The former shows the folder structure from My Computer and allows you the select any folder. I did this, but Express Lab did not open any pictures as I had set an exclude rule.
You have the following functions available: File Save, File Save As, Normal Viewing, Fit Image To Window, Zoom, Pan Tool, Straighten tool, Crop Tool, Smart Photo Fix, Makeover Tool, Clone Brush, Red Eye Tool, Rotate Right, Rotate Left, Delete and Help Topics. There is no sharpening tool and no resize tool. One of the common tasks I need is to resize a set of images for publishing on the web, but you cannot use Express Lab to do this. When you exit the Express Lab, the last image you were working on is left loaded in X2. This is not surprising as I'm sure the Express Lab is using the main program to make the edits, but presenting the user with a different interface.
Apart from improving the touch up features like the sun tan effect, Corel have added a Thinnify function to make people look thinner. It works by reducing the width of a subject that you click on, without reducing the width of the entire image. The selective reduction graduates the effect but the background is affected slightly. It doesn't work unless the person is standing and by themselves and is really a gimmick. Depending on how the subject is positioned you can end up with someone who looks thinner but has shortened legs or fat arms. To really produce this effect you would to need to cut out the person as a separate layer and alter that. Then you would need to clone the original picture to remove the subject. It can be done, but it is a complex task, so I suppose the one click option is a quick simple method.
The Eye Drop is supposed to remove bloodshot eyes, but I found it very inaccurate. The only option you have is strength (from 1 to 100) even though there is a size option shown but is not active. Clicking on the red part of the eye did whiten the eye, but the effect leaked onto the face, sometimes lightened the whole face. The Toothbrush tool, used for whitening teeth, has exactly the same effect on the picture. I had more success removing the red lines using the Blemish tool.
|
|
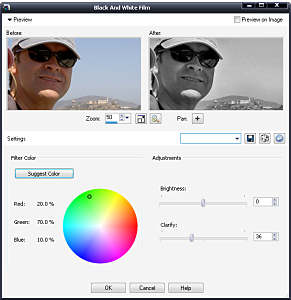
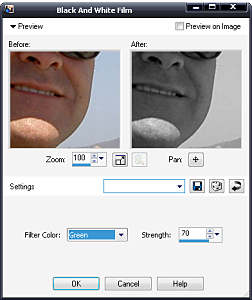
The Black and White Film effect has changed to give you a complete choice of filter colour. Before you only had a drop down of Red, Green, Yellow, Orange, Blue or None with a strength amount and two controls of Brightness and Clarify to adjust the contrast. The contrast of the final image can be enhanced and depending on the tone of colours certain objects will stand out more. The effect could also be done using the contrast or histogram function to change the tone, and then reduce the saturation; this does most of that in the one dialog.
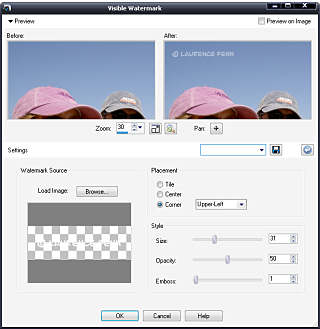
The Watermark function has added a Visible Watermark function to the Embed and Read options. This allows you to select an image and place it in a corner, centre it or even tile it and select the size, opacity and whether to use an emboss effect. If you use a bitmap or image without any transparency, it does not detect or allow you to select a transparent colour. I created a simple copyright notice and saved it as a PNG file with a transparent background. It only worked if I used a light colour for the writing; otherwise the entire background was loaded as black as well as the writing (resulting in just a black rectangle). It is far easier to create a new layer on your image and create your watermark there as you have more flexibility.
The Organiser catalogues your photo collection, but I found it slowed my system down considerably. I foolishly organise my photos so I know where they are, and organise the folders appropriately so I don't need to catalogue them. If I want to browse the photos to find a particular one then this is fine, but I don't need the program to search for all the photos. I especially didn't like the option of it searching for the photos even when the program was closed down. I tend to collect my photos and then burn them to a DVD when I have around 4.36 GB worth and then start the process again, so I don't have my entire collection the hard disc. Despite this, the program was noticeably slower until I set an exclusion to prevent the program from cataloguing the entire hard disc. Not everyone has a super fast system, and even though my system is not that slow, the default settings almost made the program unusable.
|
|
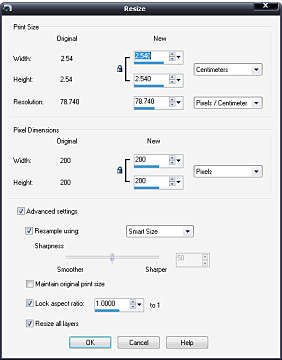
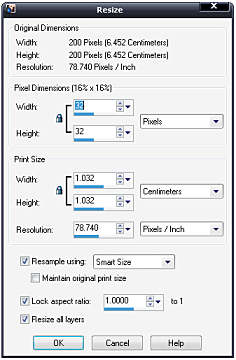
The Resize dialog has been redesigned, and I found it less helpful than before. You cannot easily see the percentage change you are making when resizing the image, which I found useful. You do have a sharpen control, which I suppose will mean I don't have to unsharpen an image after making it smaller, which I used to do in the previous version.
The Crop tool has changed slightly as you cannot grab the side of the rectangle to change the area you want to crop. You can only use the anchor points at the corners and the middle of the sides. You can crop to a new image, which is quicker than the old method of making a selection and then doing a copy and paste as new image. If you scan in several photos at once, you can crop the image into the individual images.
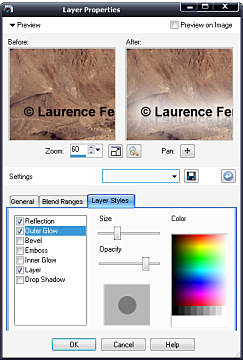
Layer Styles is a new feature that lets you apply a style to the layer. This effect changes according to the contents of the layer. Previously if you added some vector text to an image, it had to be converted to a raster layer (so you couldn't edit the text) if you wanted to apply an effect to it. Now you can select the Layer Styles tab on the layers palette and tick a box to add Reflection, Outer Glow, Bevel, Emboss, Inner Glow and Drop shadow effect. You can adjust the size, opacity and colour (actually spelt color in the dialog) and in those of Bevel, Emboss and Drop Shadow you can change the direction by moving a pin on a sphere. This is much smaller than on the controls dialog for these effects when you select them from the 3D Effects menu, and does not include the vertical and horizontal offset which you can use to fine tune the position. I could not create a drop shadow effect that was even close to the text layer I added using the Layer Styles, but the other effects were fine.
Save For Office gives you optimisation for Desktop Printing, Professional Printing and Screen or email which changes the maximum dimensions of the image as well as the dpi (for image quality). You can choose the filename of course, but are limited to BMP, JPG, PNG, TIF or WPG file formats in the dialog. This has also been added to a Special Copy function, so you can copy and paste images directly into documents, having them optimised before you paste them in.
Auto-Preserve Originals prevents you from losing the original image if you have edited it, by creating a new folder in the folder where the image is. The original image is copied there, and the editing version replaces the image in the original location. If you open up the edited version, you can restore to the original version, but this cannot be undone. Your edits will be lost as the original file is copied over your edited copy. I would have thought a simple rename with a copy in the same directory would have been an easier option rather than creating another directory.
After going through the settings and turning off the Auto Preserve, stopping the Organiser from cataloguing my images (even after the program has been closed, which it will try to do unless you tell it not to) and stopping the Photo Downloader, I found that saving images seems to take longer for a while, whether I'm editing an existing image or saving a new image that I've just scanned in. The images did not have any layers and the format I chose was JPG. The program will warn you if you save an image with layers in a format that does not support it but I couldn't see any reason why the program would take so long to save any image. Editing the image exactly the same way using version XI and then saving it was much quicker, but I had completely switched off the Organiser in that version. It was only the next day when I started editing existing images did the save feature seem quicker. It may have a been a bug in my system, but certainly the extra programs and services set to run automatically by the default settings of X2 didn't help.
I couldn't really recommend upgrading from XI to X2, as the changes are minimal and the tweaks to some of the functions are minor. The new interface can make a difference to the way you see your photos but that's not a good enough reason to upgrade. However, if you do not have a previous version, then Paint Shop Pro Photo X2 (and I wish they would come up with a shorter name) it is excellent for editing your pictures, and is cheaper than the main competition of PhotoShop. You still get the Learning Centre which guides you through the many functions if you do not know what to do, and there are always the Lynda.com training videos on the CD.
Paint Shop Pro Photo X2 also includes the new Corel MediaOne Plus program for making slide shows and collages from photos and video. Or rather it was supposed to, but at the time of release (at least with the review copy I was trying) it is not included on the disc. It is available as a special download, but when I installed X2 it had not yet been released. A few weeks later I saw it was available on the web site, but I could not find a link to download it, even after registering X2. Despite mentioning that the program is available as a special download on the PSPX2 page, there was no link to follow, only one for the trial Starter version. I had to send an email to support, but within the day Corel had sent back a link to page with a serial number and a link for the 240Mb download.
Back